You've filled the tub. You're standing in front of the freezer. You have three bags of ice and absolutely no idea if that's enough — or way too much. This is where most people guess, dump it all in, and either end up with barely cold water or a near-hypothermic experience. Getting the ice amount right is genuinely simple once you understand the logic behind it. This guide cuts through the noise and gives you the numbers, the formula, and the practical details you need to get your setup dialed in from day one.
How Much Ice Do You Actually Need?
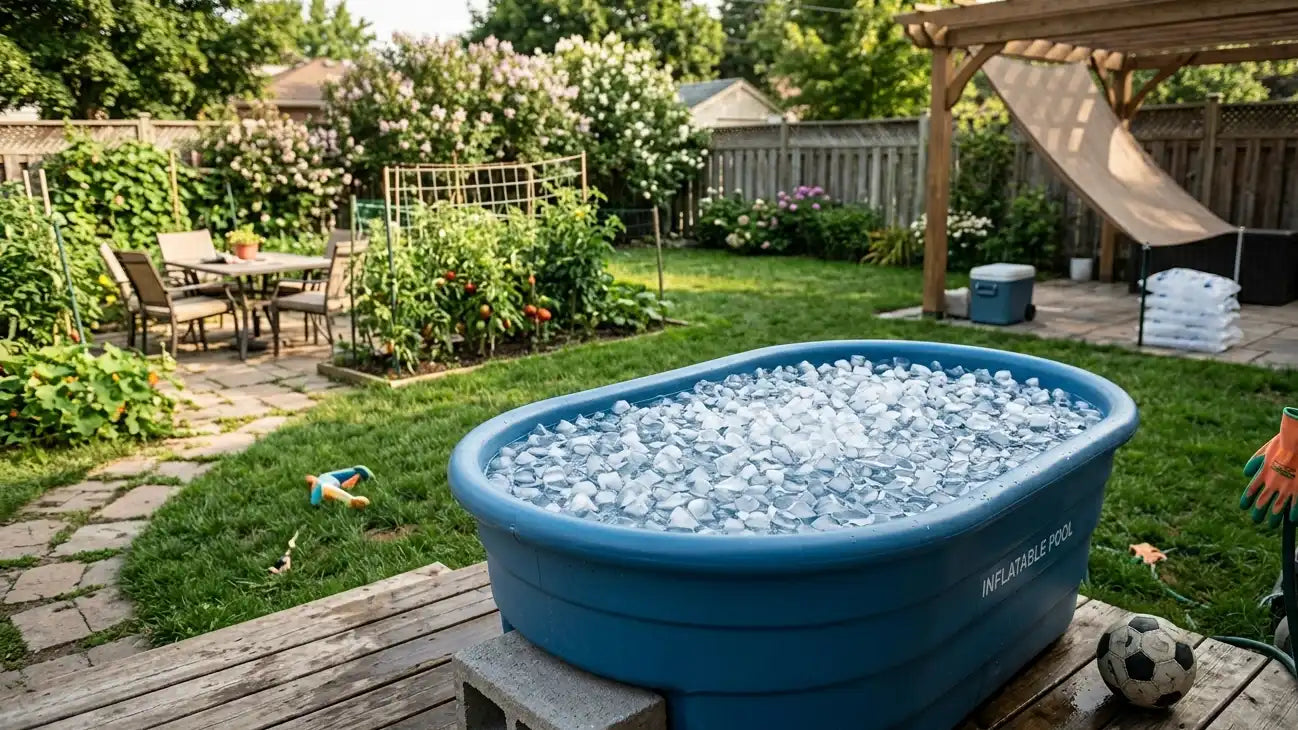
For most home setups, 20–40 lbs (9–18 kg) of ice is a reasonable starting point. That covers a standard bathtub or a small portable tub filled with cold tap water.
Here's a fast reference based on tub size:
| Tub Size | Water Volume | Ice Needed | Approx. Bags (10 lb) |
|---|---|---|---|
| Small (bathtub / personal tub) | 40–50 gal (150–190 L) | 20–40 lbs (9–18 kg) | 2–4 bags |
| Medium (cold plunge tub) | 60–80 gal (230–300 L) | 50–80 lbs (23–36 kg) | 5–8 bags |
| Large (stock tank / barrel) | 100–120 gal (380–450 L) | 80–120 lbs (36–54 kg) | 8–12 bags |
These numbers assume your tap water starts around 60–70°F (15–21°C) and you're targeting a final temperature of 50–59°F (10–15°C). If your water starts colder, you'll need less. If it's a hot summer day, plan for more.
One sentence rule: use a 1:3 ratio — one part ice to three parts water by volume.
What Temperature Should Your Ice Bath Actually Be?
Before worrying about how much ice, it helps to know what you're aiming for. The effective range for cold water immersion sits between 50°F and 59°F (10°C and 15°C). That window is cold enough to trigger the physical responses most people are after — reduced inflammation, faster muscle recovery, improved alertness — without pushing into territory that's unnecessarily risky.
Below 50°F (10°C), the intensity increases significantly. Some experienced users go lower, but for most people it doesn't offer meaningfully better outcomes, and it does increase the risk of overstaying and going too cold.
Above 59°F (15°C), the water may feel cold but the physiological effect becomes limited. If you're soaking at 65°F, you're mostly just uncomfortable rather than getting the benefits of cold therapy.
A floating thermometer is the single most useful tool for ice baths. It removes all the guesswork about whether you've added enough ice.
Goal: Target 50–59°F (10–15°C). Stay above 40°F (4°C) unless you're experienced and deliberate about it.
For context on what ice baths can actually do for your body, see Are Ice Baths Good for You? — it covers both the benefits and the real limitations without overpromising.
The 1:3 Ice-to-Water Ratio Explained
The 1:3 rule is the most widely cited starting point for ice baths: one volume of ice for every three volumes of water.
In practical terms:
- If your tub holds 40 gallons of water, you want roughly 10 gallons of ice — about 77 lbs
- If your tub holds 60 liters of water, add approximately 20 liters of ice — around 18 kg
This ratio gets the water into the right temperature zone in most conditions. It's not a fixed law. Several variables push that number up or down, and the section below covers each of them.
One thing worth knowing: ice is less dense than water. A gallon of ice weighs about 7.7 lbs (3.5 kg), so when bags are labeled by weight, you need to convert. A 10-lb bag is roughly 1.3 gallons of ice.
The 1:3 ratio is a starting point — once you've done two or three sessions, you'll naturally calibrate to your specific setup.
Ice Bath Calculator
If you want a more precise estimate, here's the logic that drives the calculation:
Ice needed (lbs) = Tub volume (gallons) × Temperature drop needed (°F) × 0.125
For example: a 50-gallon tub starting at 70°F, targeting 50°F:
- Temperature drop = 20°F
- Ice needed = 50 × 20 × 0.125 = 125 lbs
That feels like a lot — and it is. Most home setups don't use that much because:
- Starting tap water is often already closer to 60°F
- Well-insulated tubs need less
- Many people add ice gradually and stop when the thermometer reads right

Quick reference chart (targeting a 15°F drop, standard home tap water):
| Tub Volume | Ice Needed | 10-lb Bags |
|---|---|---|
| 30 gal | ~56 lbs | ~6 bags |
| 40 gal | ~75 lbs | ~8 bags |
| 50 gal | ~94 lbs | ~9–10 bags |
| 60 gal | ~113 lbs | ~11–12 bags |
| 80 gal | ~150 lbs | ~15 bags |
| 100 gal | ~188 lbs | ~19 bags |
These numbers are for a 15°F (8°C) drop. Adjust up for warmer starting water or a colder target, down for colder tap water or a warmer target.
6 Factors That Change How Much Ice You Need
The formula gives you a baseline. These six variables are what push your actual number above or below it.
1. Tub Size and Water Volume
Bigger tub = more water = more ice required. This is the most straightforward factor. Know your tub's actual capacity, not the advertised maximum fill. Most people fill their tub 60–70% to leave room for themselves.
2. Starting Water Temperature
Tap water temperature varies significantly by season and location. Summer tap water can easily be 65–70°F (18–21°C). Winter tap water in colder climates may come out at 50°F (10°C) or lower — meaning you might not need much ice at all. Check your tap water temp before filling so you can plan your ice order.
3. Target Temperature
Want to sit at a mild 58°F? You'll need less ice than someone targeting 48°F. Each degree lower requires more ice to achieve and more to maintain.
4. Session Duration
Ice melts continuously. A 5-minute session requires far less ice than a 15-minute one. If you plan on staying in longer — or having multiple people use the same water — add 15–20% extra ice to account for heat gain over time. Your body also warms the water around it, so the longer you stay, the more the temperature creeps up.
5. Ambient Temperature and Humidity
An outdoor tub on a hot August afternoon in direct sunlight will lose cold much faster than one in a shaded garage. High humidity also slows evaporation, which reduces one of the natural cooling mechanisms. If you're working in warm conditions, add ice generously.
6. Personal Cold Tolerance
Beginners often start at 58–60°F and work their way down over weeks. If you're just starting out, there's no reason to target the lowest end of the range on day one. Use less ice, stay shorter, and build from there. This also applies to how uncomfortable you're willing to be — there's no single "correct" temperature.

Winter vs Summer
This is one of the most overlooked variables. The same ice bath setup requires a completely different amount of ice depending on the time of year.
In summer:
- Tap water can be 68–75°F (20–24°C) — significantly warmer than your target
- Outdoor tubs heat up from ambient air and direct sun
- Ice melts faster, so you need more to reach temperature and more to sustain it
- Plan for 30–50% more ice than your baseline estimate
In winter:
- Tap water in cold climates often comes out at 45–55°F (7–13°C)
- In some regions, cold tap water alone brings you close to your target with minimal or no ice
- A completely outdoor tub in freezing weather may actually require no ice — and may freeze if left uncovered
| Season | Tap Water Temp | Ice Adjustment |
|---|---|---|
| Summer (hot climate) | 68–75°F (20–24°C) | +30–50% more ice |
| Spring / Fall | 55–65°F (13–18°C) | Use baseline estimate |
| Winter (mild) | 50–58°F (10–14°C) | Reduce by 30–40% |
| Winter (cold) | 40–50°F (4–10°C) | Minimal or no ice needed |
Check your tap water with a thermometer at least once each season. It takes 30 seconds and saves you from either buying too much ice or ending up with a lukewarm bath.
Block Ice vs Crushed Ice
Both work. The difference is how they behave once they're in the water.
Crushed ice has more surface area, so it melts faster and drops the water temperature quickly. If you want to hit your target temperature in 5–10 minutes, crushed ice is efficient. The downside is that it doesn't last — once the water temperature is set, it offers little ongoing cooling.
Block ice melts slowly, which keeps the water cold longer. If your session runs 15+ minutes or you're doing multiple sessions before changing the water, block ice does a better job of maintaining temperature over time.
The practical approach: use a mix. Add crushed or cubed ice first to drop the temperature quickly, then add one or two larger blocks to sustain it.
| Ice Type | Cools Fast | Lasts Long | Best For |
|---|---|---|---|
| Crushed ice | ✓ Yes | ✗ No | Quick sessions, fast setup |
| Cubed ice | Moderate | Moderate | General use |
| Block ice | ✗ No | ✓ Yes | Longer sessions, sustained temp |
| Mixed (cubed + block) | ✓ Yes | ✓ Yes | Most situations |
One tip often missed: smaller cubes are not always more efficient. Once the water is at temperature, large ice blocks melt slower and maintain the cold without requiring you to add more mid-session.
How to Make Your Ice Last Longer
Buying ice for every session gets expensive fast. A few simple habits extend how long your ice stays effective.
Pre-chill the tub. Fill it with cold tap water 20–30 minutes before adding ice. A pre-cooled tub absorbs less heat from the ice, so more of it goes toward actually cooling the water.
Use a lid or cover. Evaporation pulls heat out of the water — which sounds useful — but it also lets warm ambient air above the surface transfer heat back in. A lid reduces both. Even a towel draped over the surface between sessions makes a noticeable difference.
Insulate the tub. Dedicated cold plunge tubs with insulated walls hold temperature far better than thin plastic containers. If you're using a basic inflatable tub, placing it in a shaded or climate-controlled location helps a lot.
Stir the water before and during. Cold water sinks. If you don't stir, you can end up with very cold water at the bottom and warmer water near the surface. A quick stir before getting in and occasionally during the session keeps the temperature consistent throughout.
Store unused ice correctly. If you're doing multiple sessions in a day, keep unused ice in a cooler with a lid rather than leaving it exposed. A good cooler can keep ice usable for several hours.
Reuse frozen water bottles. Filled water bottles frozen solid can be dropped into the bath, pulled out, and re-frozen. They don't melt into the water (keeping it cleaner), and they can be reused indefinitely.

Water Chillers
If you're doing ice baths three or more times a week, the cost and logistics of buying ice adds up quickly. At $2–4 per 10-lb bag, a regular practice can run $20–40 per week just in ice.
A water chiller connects to your cold plunge tub and continuously circulates cold water, maintaining a precise temperature without any ice required. You set the target temperature once, and the chiller handles the rest.
What a chiller actually offers:
- Precise temperature control (typically down to 39–50°F / 4–10°C)
- No ice buying, no logistics
- Reuse the same water for weeks with a filtration system
- Lower ongoing cost once the initial investment is recovered
Cost comparison:
| Method | Setup Cost | Weekly Running Cost | Annual Total |
|---|---|---|---|
| Bagged ice (3× per week) | $0–150 (tub only) | $25–40 | $1,300–2,000+ |
| Water chiller + tub | $800–2,000 | ~$3–5 (electricity) | $950–2,260 first year |
The break-even point for most users is 6–18 months depending on session frequency and ice cost in their area.
For anyone building a consistent cold exposure habit, the Ice Dragon water chiller range is worth looking at — they offer options from 1/3 HP entry-level units to 1.5 HP WiFi-controlled systems that also support heating for contrast therapy use.
For a side-by-side view of cold exposure methods, Cold Shower vs Cold Plunge breaks down how the options compare in terms of convenience and effectiveness.
Summary
How much ice for an ice bath depends on your tub size, starting water temperature, and target temperature — but for most home setups, 20–40 lbs gets you started. Use the 1:3 ice-to-water ratio as a baseline, adjust for the season and your specific conditions, and invest in a thermometer so you're working from data rather than guesswork. Crushed ice cools fast, block ice lasts longer — a mix of both works well for most sessions. If you're doing this regularly, a water chiller removes the ice logistics entirely and pays for itself within a year or two.
FAQ
How many bags of ice do I need for an ice bath in a standard bathtub?
A standard bathtub holds roughly 40–50 gallons of water. Using cold tap water, you'll typically need 4–6 standard 10-lb bags (40–60 lbs total) to reach the 50–59°F range. In summer, add an extra bag or two since tap water runs warmer.
How much ice do I need for a cold plunge tub if I use it every day?
For daily use with a 60–80 gallon tub, you'd need 6–10 bags of ice per session — that's 60–100 lbs. At that frequency, a water chiller becomes a far more practical and cost-effective setup than buying bagged ice. See IceDragon's cold plunge tub and chiller bundles for home options.
Can tap water alone be cold enough for an ice bath without ice?
In winter climates, yes. Tap water at 48–55°F (9–13°C) already sits within the effective range. Check with a thermometer first — if it reads below 59°F (15°C), you may not need to add any ice at all.
How long does ice last in an ice bath, and when should I add more?
In a non-insulated tub at room temperature, ice typically lasts 20–40 minutes before the water warms past 60°F. A well-insulated tub with a lid can hold temperature for 60–90 minutes. Add more ice when the thermometer climbs above your target by 3–4 degrees. For a deeper look at session timing, see How Long to Ice Bath.
Does ice bath temperature affect muscle soreness differently from a cold shower?
Full immersion in 50–59°F water affects a much larger surface area than a shower and creates more consistent cold contact across the whole body. The two are not equivalent — ice baths produce a more pronounced physiological response. For what the evidence actually says about recovery, Does an Ice Bath Help with Soreness? covers it clearly.


